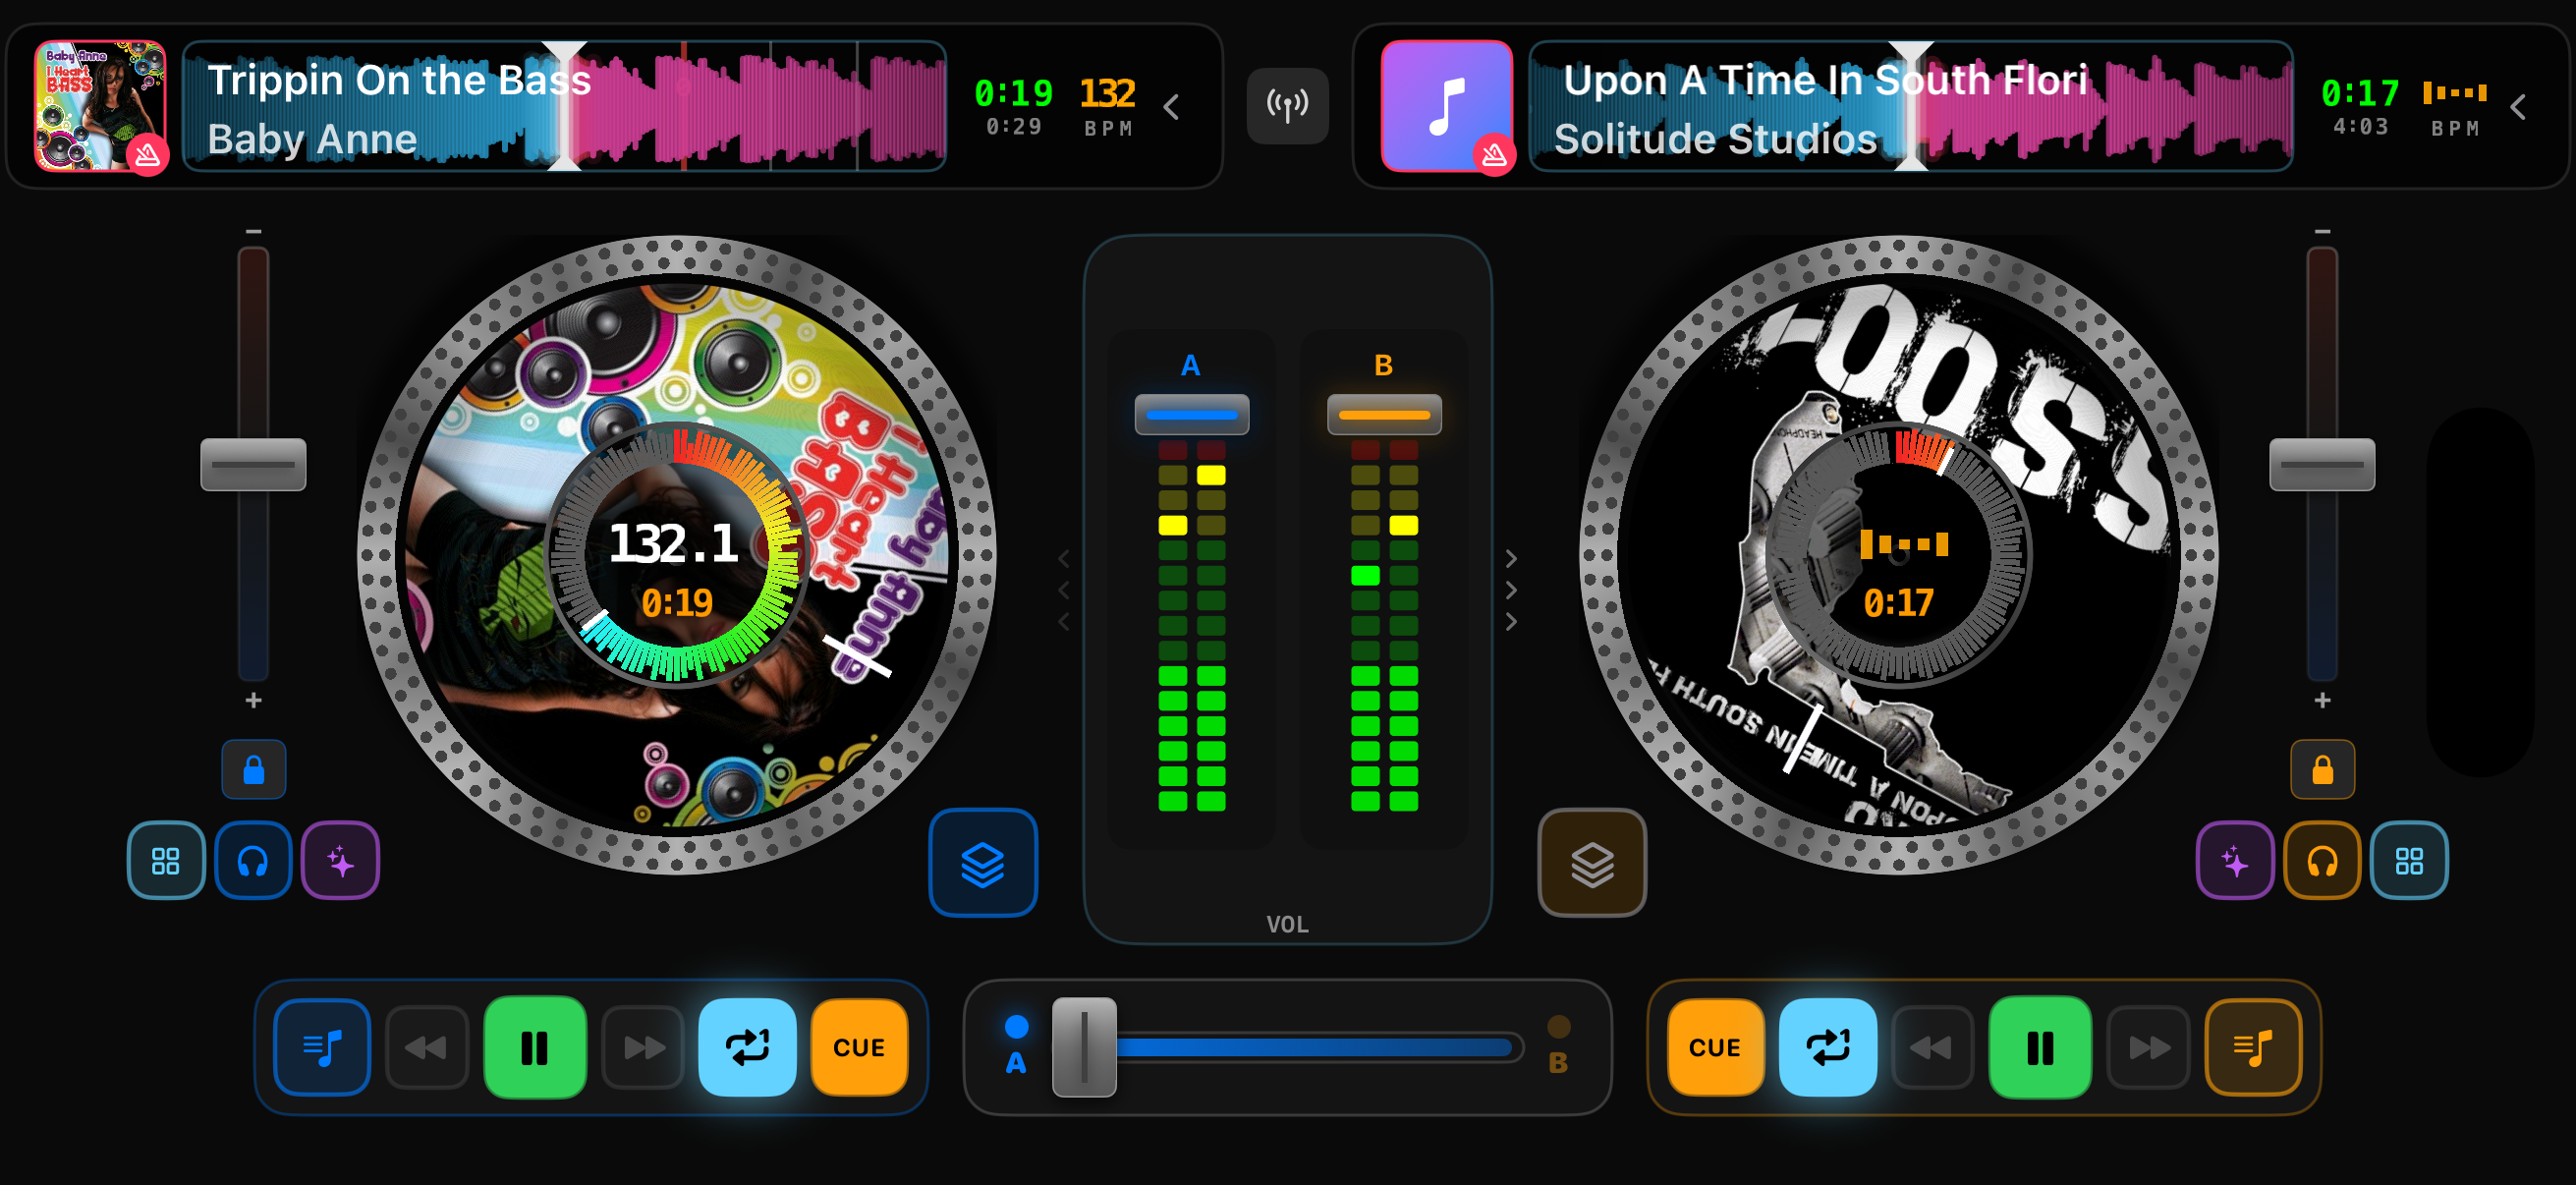
Transport Controls
Each deck has a set of transport controls for playback, cueing, and navigation through your queue.
| Button | Function |
|---|---|
| Play / Pause | Start or stop playback on the deck |
| CUE | Set a cue point at the current position. Hold to preview playback from the cue point. |
| Skip Back / Forward | Navigate to the previous or next track in the queue |
| Repeat | Cycle through repeat modes: Off, Repeat One, Repeat All |
| Headphone Cue | Send this deck to your headphones for pre-listening |
Loading States
The Play and CUE buttons change color to indicate the deck's loading state:
| State | Appearance |
|---|---|
| Loading | Play button turns yellow with a spinning animation while the track loads |
| Ready | Play flashes green and CUE flashes orange — the track is ready to play |
You can start playback as soon as the buttons flash. BPM detection runs separately in the background — playback works immediately, but SYNC and other tempo-dependent features won't work until BPM is ready.
CUE Button Details
- Tap CUE when paused to set a cue point at the current position
- Tap CUE when playing to jump back to the cue point and pause
- Hold CUE to preview playback from the cue point. Release to snap back.
- Double-tap CUE to set the main cue point at the current position
After Track Ends
When a track finishes playing, pressing Play again automatically restarts playback from the beginning. No need to seek back manually.
Crossfader
The crossfader controls the blend between Deck A (left) and Deck B (right). It is the primary tool for transitioning between tracks.
Crossfader Positions
| Position | What You Hear |
|---|---|
| All the way left | Deck A only |
| Center | Both decks at equal volume |
| All the way right | Deck B only |
Crossfader Curves
Double-tap the crossfader to cycle through curve types. Each curve changes how the volume blends as you move the fader.
Scratch
Sharp cut near the edges. Audio cuts in/out almost immediately when you move off center. Essential for scratch DJs and fast mixing styles.
Cut
Similar to scratch but slightly less aggressive. Audio switches rapidly near the edges with a small blend zone in the middle.
Linear
Even, proportional blend from left to right. Volume increases linearly as you move toward a deck. Good all-purpose curve.
Constant Power
Maintains perceived loudness throughout the crossfade. Uses a logarithmic curve to prevent the "dip" in the middle that linear curves can have.
Choosing the Right Curve
- Scratching or battle DJing: Use Scratch curve — you need instant cuts
- Hip-hop and turntablism: Use Cut curve — quick cuts with slight blend
- House, techno, and long transitions: Use Constant Power — smoothest perceived volume
- General mixing: Use Linear — predictable, works for most situations
Changing Curves
Double-tap the crossfader to cycle through curves. On DJ controllers with a curve switch, use that instead for instant access without touching the screen.
Volume Faders
Individual volume faders let you control each deck's level independently of the crossfader.
Accessing Volume Faders
Swipe to the Volume page in the center panel. Each deck has its own vertical fader alongside a stereo VU meter.
VU Meters
The VU meters show real-time audio levels for each deck. Use them to set proper gain staging before mixing.
| Level | Meaning |
|---|---|
| Green | Healthy level. Safe operating range. |
| Yellow | Approaching peak. Still safe, but watch closely. |
| Red | Clipping. Audio is distorting. Lower the fader. |
Avoid the Red
Keep your levels in the green and yellow zones. If the meters hit red, you are clipping the audio which causes distortion. Pull the volume fader down to restore clean audio.
Playback & Tempo
Control playback speed, maintain pitch with key lock, and navigate through tracks using the waveform.
Tempo Fader
The tempo fader (pitch fader) adjusts playback speed. Moving it up speeds up the track; moving it down slows it down.
| Setting | Speed Range | Use Case |
|---|---|---|
| ±6% | Very subtle | Minimal adjustment for tracks with similar BPM |
| ±10% | Standard | Most common DJ setting |
| ±16% | Wide | Mixing across genres with different tempos |
| ±50% | Extreme | Creative effects, half-time/double-time |
Configure tempo range in Settings → Tremor → Tempo Range.
Key Lock
Key lock maintains the original pitch of a track even when you change its tempo. Without key lock, speeding up a track raises its pitch (chipmunk effect) and slowing it down lowers the pitch.
- Key Lock ON — Tempo changes, pitch stays the same. Essential for beatmatching tracks with different BPMs while keeping them in key.
- Key Lock OFF — Pitch shifts with tempo. Traditional vinyl behavior.
Toggle key lock in the deck controls or via your DJ controller.
Waveform Scrubbing
Drag the waveform to scrub through the track. The playhead follows your finger, letting you quickly find specific parts of a song.
- Tap anywhere on the waveform to jump to that position
- Drag to scrub forward or backward
- The playhead turns orange while scrubbing
Turntable Scratching
Touch the turntable platter to scratch. The audio responds to your finger movement in real-time.
- Spin the platter to seek through the track
- Move back and forth for scratch effects
- Release to let the track spin back up to normal speed (with inertia)
Audio While Seeking
Enable Audio While Seeking in Settings to hear the audio as you scrub, CDJ-style. When off, audio only plays at normal playback speed.
EQ (3-Band Equalizer)
The 3-band EQ lets you boost or cut specific frequency ranges on each deck. This is essential for smooth transitions and avoiding frequency clashes.
Accessing the EQ
Swipe to the EQ page in the center panel. On iPad 2-deck layout, EQ knobs (HI/MID/LOW/CFX) are integrated below the volume faders.
EQ Bands
| Band | Frequency Range | What It Controls |
|---|---|---|
| HIGH | Treble frequencies | Hi-hats, cymbals, vocal sibilance, synth highs |
| MID | Midrange frequencies | Vocals, snares, guitars, most melodic content |
| LOW | Bass frequencies | Kick drums, bass lines, sub-bass |
EQ Kill
Turn a knob fully left to completely cut that frequency band. This is called an "EQ kill" and is useful for transitions and creative effects.
Quick Tip
Center position (12 o'clock) is unity gain, meaning no boost or cut. Start with all EQ knobs centered and adjust from there.
Your First Mix
Ready to mix your first transition? Follow these steps to blend two tracks together.
Both decks loaded and ready to mix
Load a track to Deck A and press Play. Move the crossfader all the way to the left so you only hear Deck A.
Load a track to Deck B. Enable the headphone cue button on Deck B so you can preview it in your headphones without the audience hearing.
Press SYNC on Deck B to match its tempo to Deck A. The BPM values should now be aligned.
Wait for the right moment. Listen in your headphones and find a good point to start Deck B, usually at the beginning of a phrase (every 8 or 16 bars).
Press Play on Deck B at the start of a phrase on Deck A. The beats should be aligned thanks to SYNC.
Transition using the crossfader or EQ. Slowly move the crossfader toward the center, or use EQ swapping (see below) for a smoother blend.
Practice Makes Perfect
Your first few mixes might not be perfect. The key is practicing the timing: starting Deck B at the right moment and moving the crossfader smoothly. With practice, this becomes second nature.
EQ Swap Technique
The EQ swap (also called "bass swap") is a professional mixing technique that creates smoother transitions than the crossfader alone. It prevents the bass frequencies from both tracks clashing.
How It Works
Keep the crossfader centered so both decks play at equal volume.
Cut the LOW on Deck B by turning the LOW knob fully left. You now hear both tracks, but only Deck A has bass.
When ready, swap the bass: bring Deck B's LOW up to center while simultaneously cutting Deck A's LOW. Do this on the first beat of a bar.
Fade out Deck A using its volume fader or by cutting its MID and HIGH. Deck B is now the main track.
Why This Works
Two bass lines playing simultaneously sound muddy and clash with each other. By keeping only one bass at a time, your mix stays clean and punchy. The swap should happen on a strong beat, ideally beat 1 of a bar.